


You’re one download and one click away from running the Axy app on your machine. That click might look different depending on your operating system.
Installing Axy looks slightly different on Windows, macOS, and Linux. The good news? Once you know which file to use and what to expect on first launch, there’s very little friction.
Windows makes you push past a warning that looks like it’s blocking malware. macOS shows you nothing at all. Linux skips both and just wants one line in a terminal. That’s not a bug in any of the three. It’s how differently each one treats new software before it runs.
This guide walks you through the exact installation process for each platform and explains the few moments that might catch you off guard.
Pick your Axy file
Before downloading anything, choose the build that matches your operating system. There are four files, one per platform, and Mac users have one extra decision to make: Apple Silicon or Intel? Go to Apple menu → About This Mac to check your processor. Guess wrong and the app won’t open.
The file most people reach for by habit, the plain Axy-0.1.2.dmg, is actually the Apple Silicon build, which is backwards from what most people expect. Check first, download second.
| Platform | File | Size |
|---|---|---|
| macOS, Apple Silicon | Axy-0.1.2.dmg | ~126 MB |
| macOS, Intel | Axy-0.1.2-Intel.dmg | ~131 MB |
| Windows, x64 | Axy-0.1.2.exe | ~94 MB |
| Linux, x64 | Axy-0.1.2.AppImage | ~134 MB |
Reading this later and the version has moved on? That’s okay, because building Axy is an ongoing process. The version number above may change over time, but the same filename pattern applies. release.json is the manifest that always names whatever build is live.
Windows
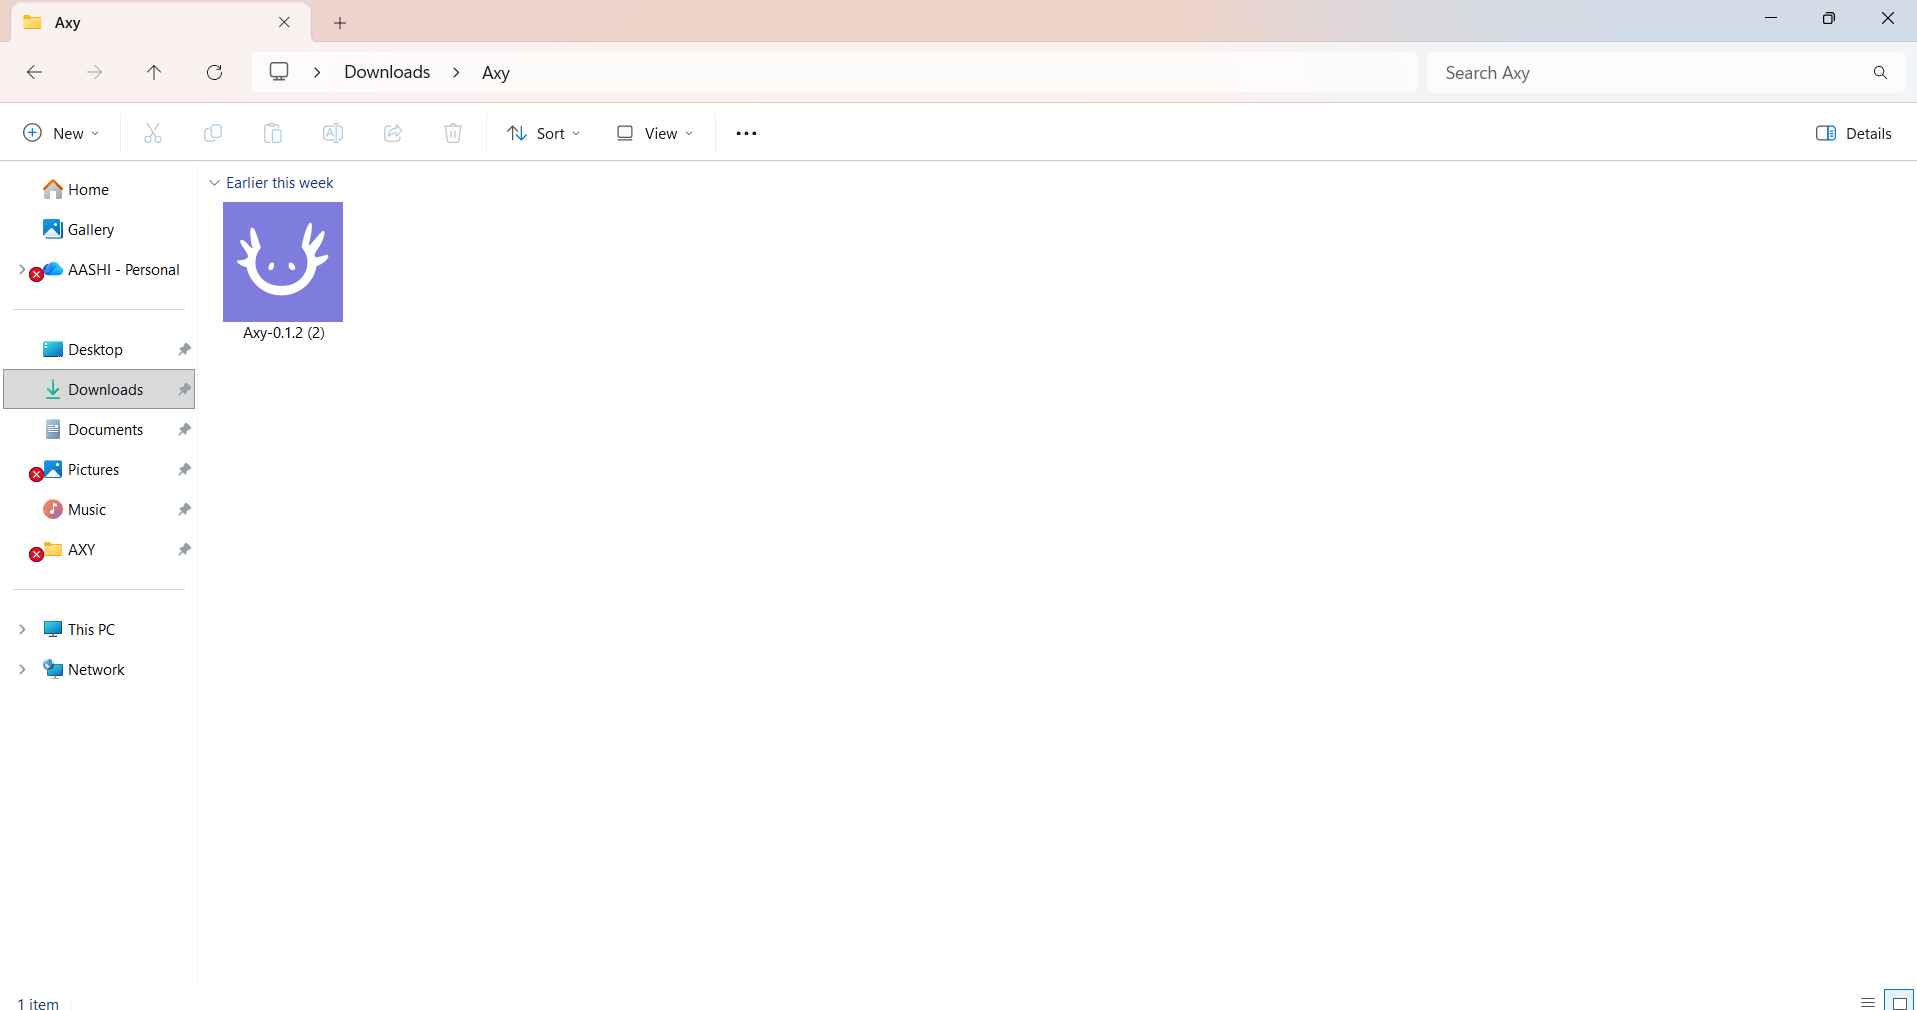
Run the installer. Open the downloaded .exe file. Axy installs per-user, so you don’t need administrator access to get started.
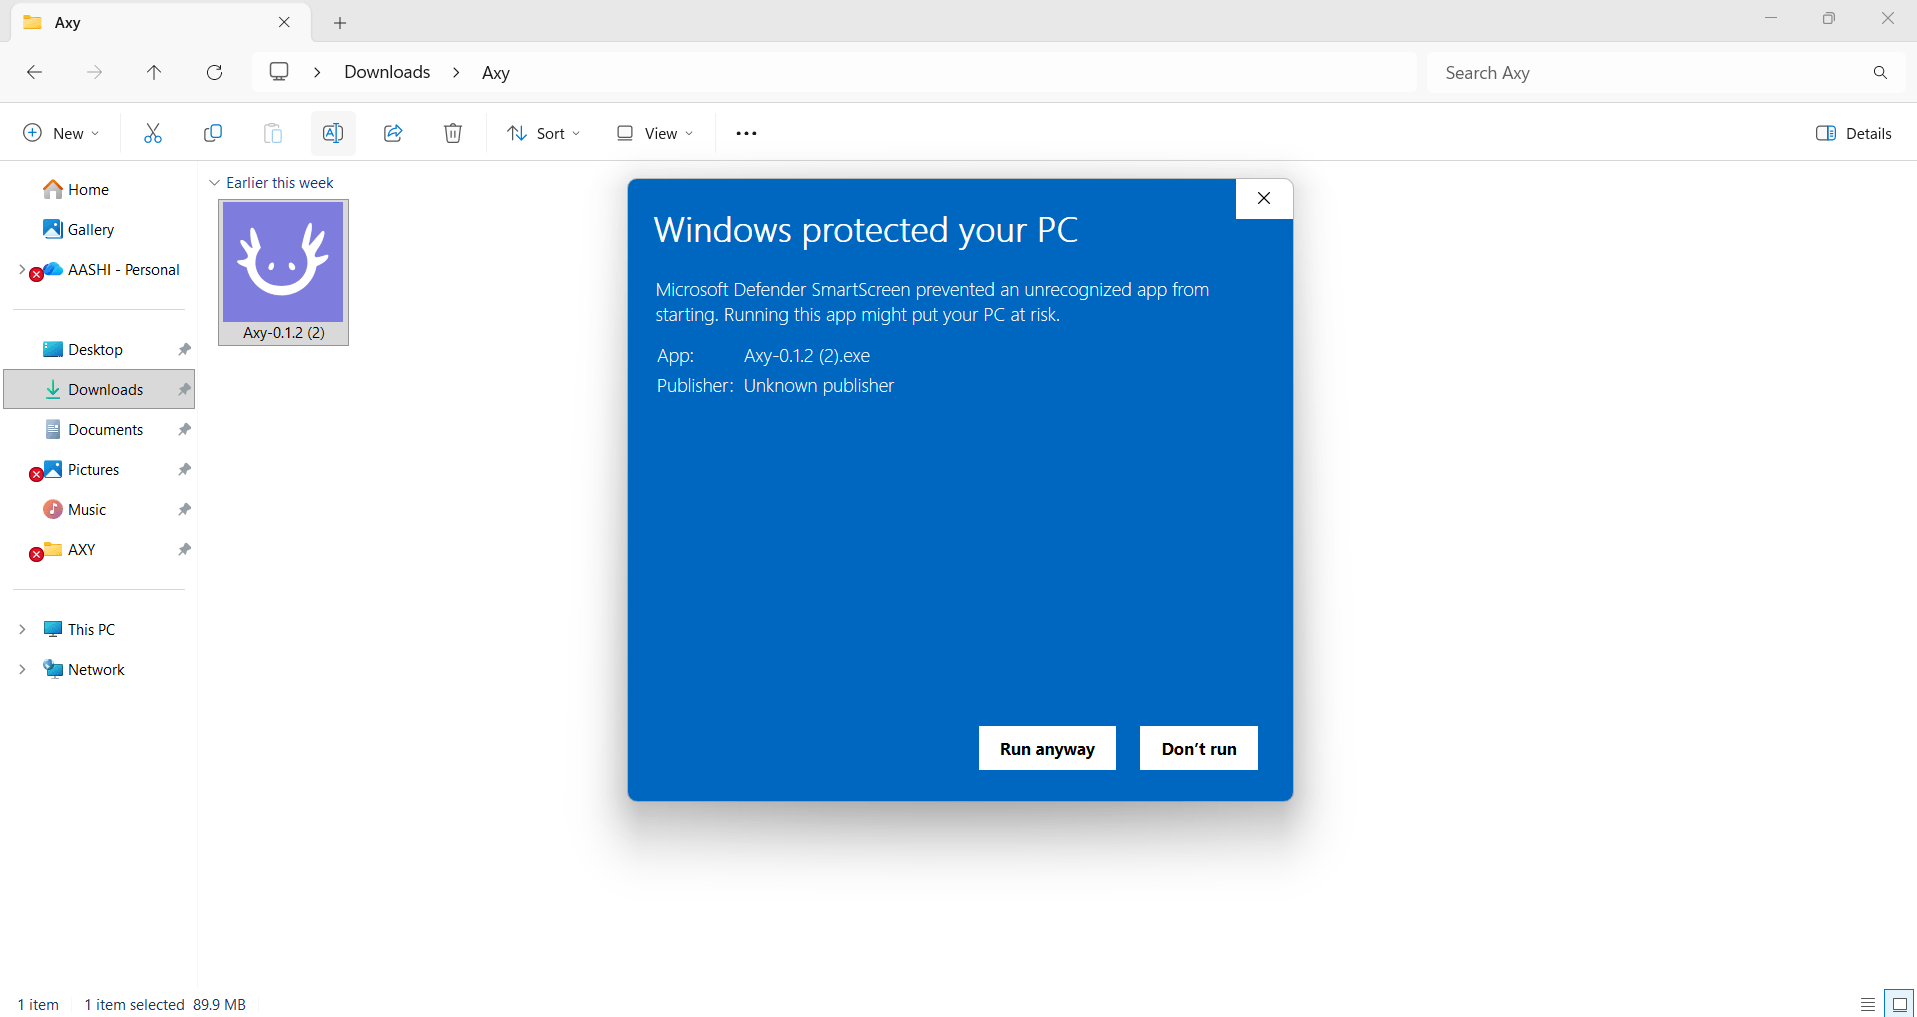
See a Windows security warning?
You may see a Windows SmartScreen or Defender warning, because the current Axy .exe isn’t code-signed yet, so SmartScreen (or Defender) flags it as an unrecognized app. This isn’t a problem with your download; it’s the current, known state of the build. Click More info, then Run anyway, and installation will continue normally.
Give the installation a moment
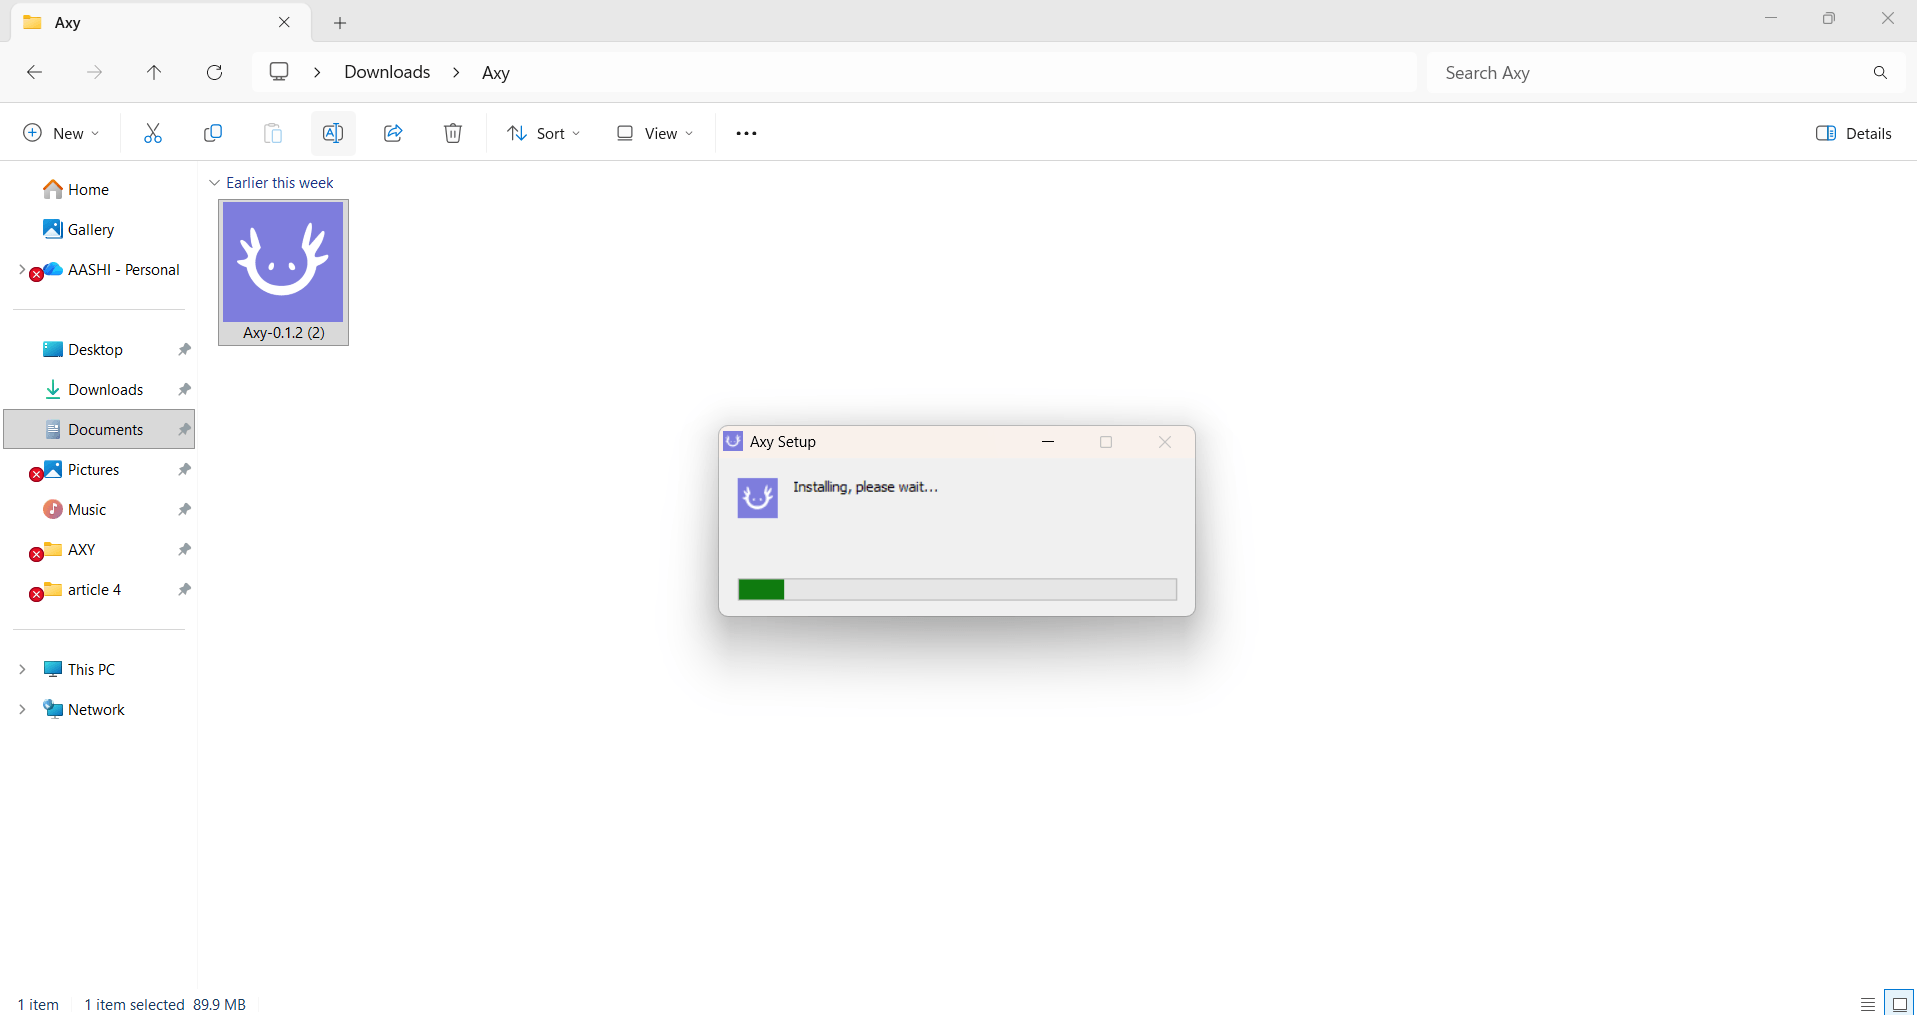
It can take a little while to install and may look stuck, but don’t close it. Let the installation continue.
macOS
Open the .dmg file that matches the processor you identified earlier:
- Apple Silicon →
Axy-0.1.2.dmg - Intel →
Axy-0.1.2-Intel.dmg
Then drag Axy into Applications.
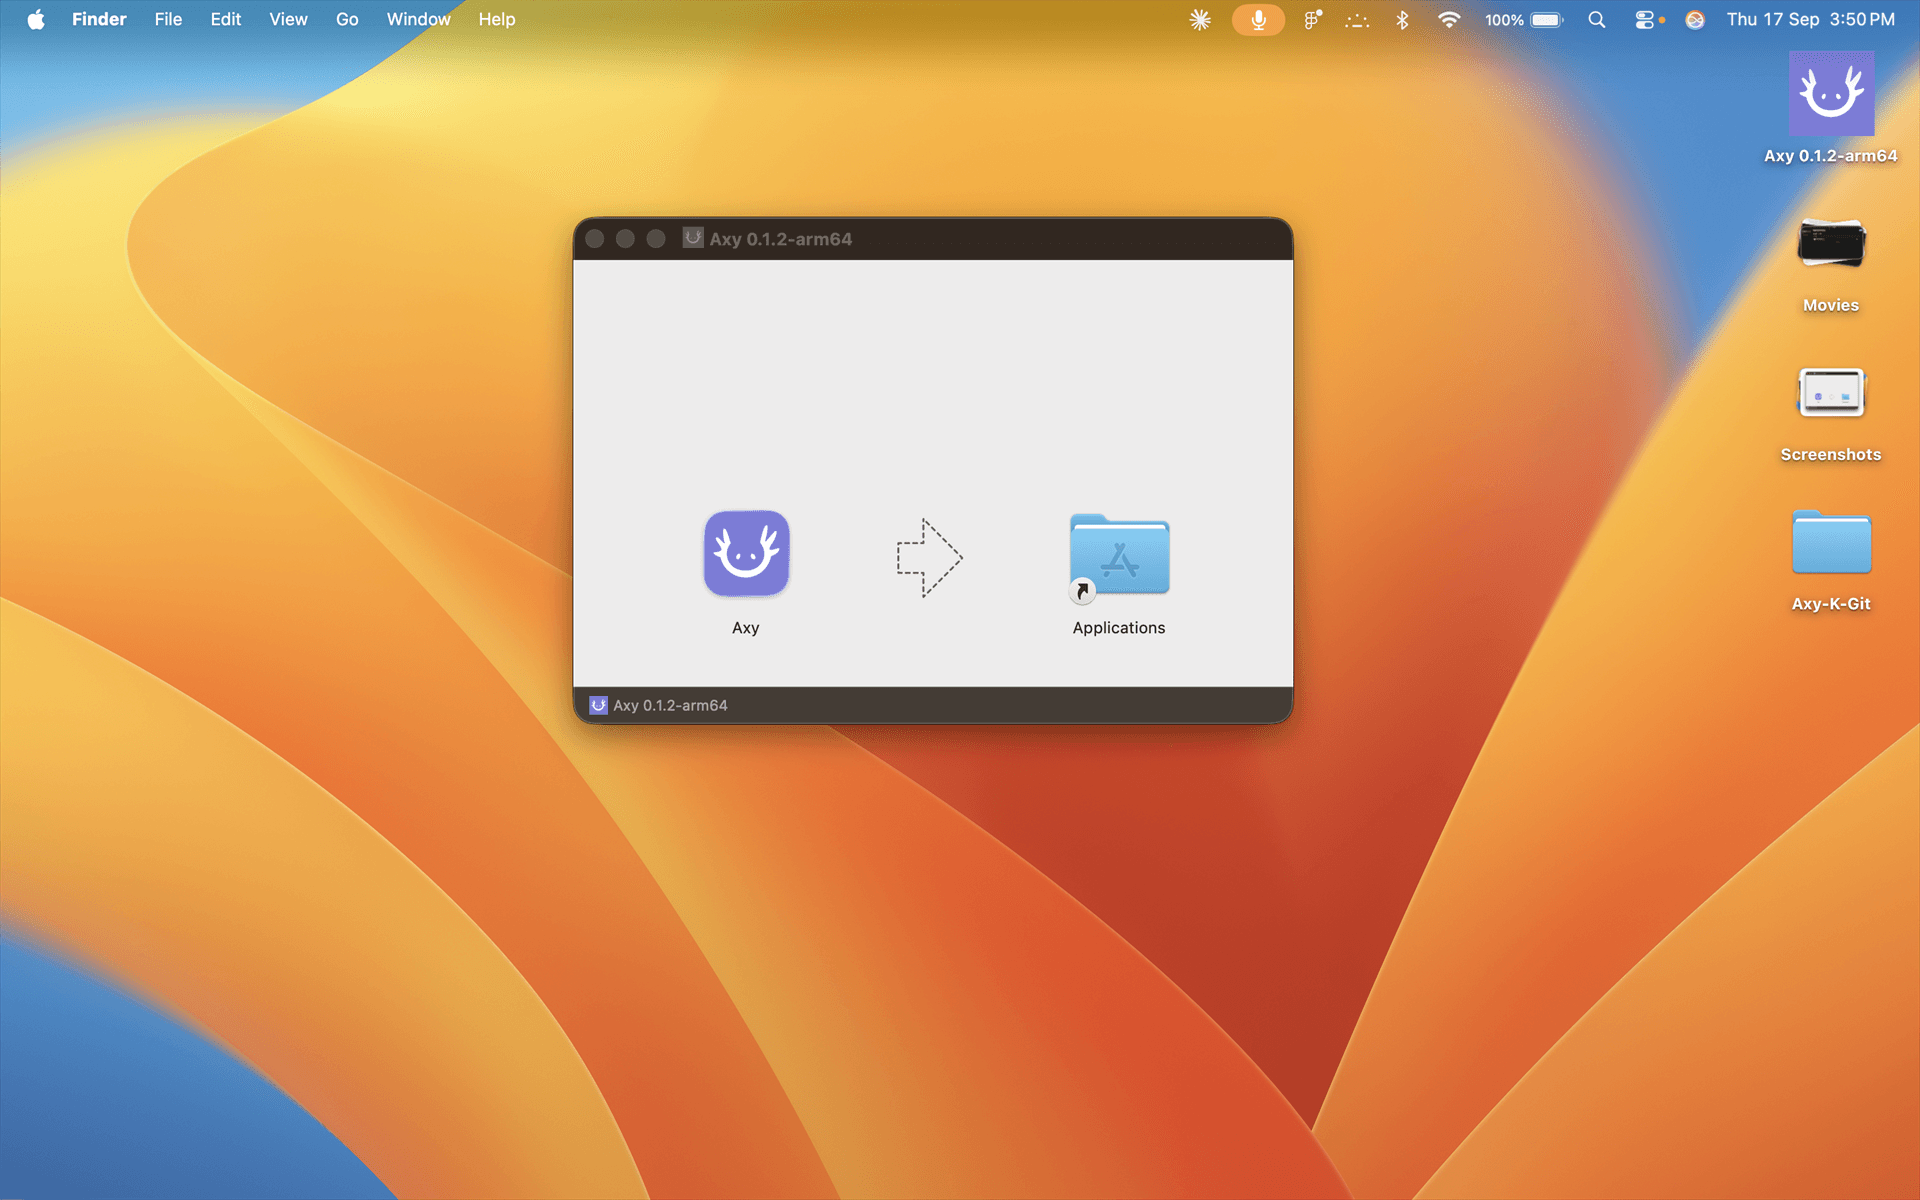
Unlike Windows, there’s no warning to click through. The Mac build is signed and notarized, so Gatekeeper opens it the same way it opens any other trusted app. No “unidentified developer” dialog, nothing to override.
One prompt you might see
This is more of a heads-up. After signing in, particularly when using Explore, macOS may ask whether “Axy” would like to access data from other apps. This is the standard App Management permission, and it may appear once per installation. There’s no in-app explanation for it yet, so consider this that explanation.
Linux
Download the AppImage. Linux currently uses a single x64 AppImage build. There’s no .deb, no .rpm, and no arm64 build. If you’re on ARM Linux, there isn’t a build for your machine yet.
Once downloaded, make the file executable and run it:
chmod +x Axy-0.1.2.AppImage
./Axy-0.1.2.AppImage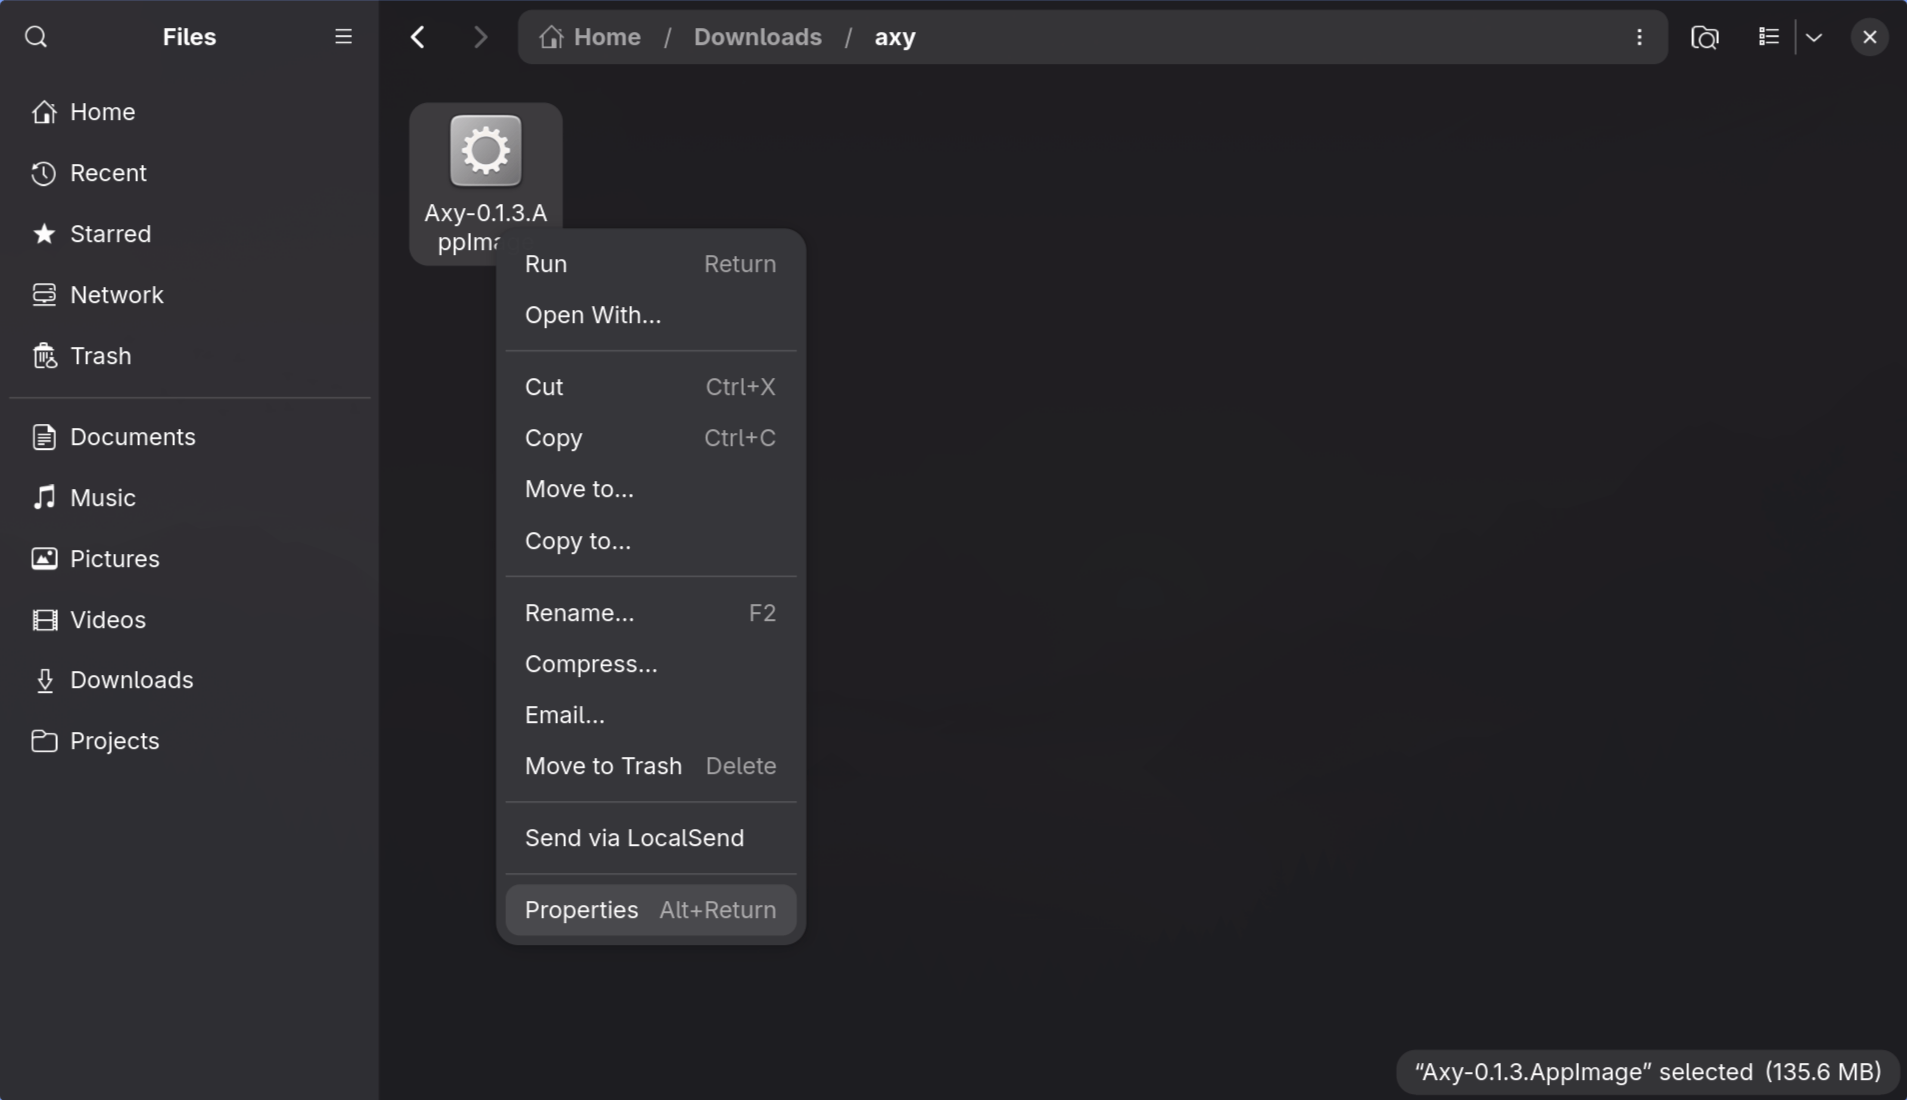
One important difference
The AppImage is the application. It doesn’t install itself elsewhere or appear in your application menu automatically. Choose a location to keep the file and launch Axy from there whenever you want to use it.
First launch, on all three
The first launch follows the same pattern on every platform, and one thing might feel unusual: signing up or signing in leaves the app.
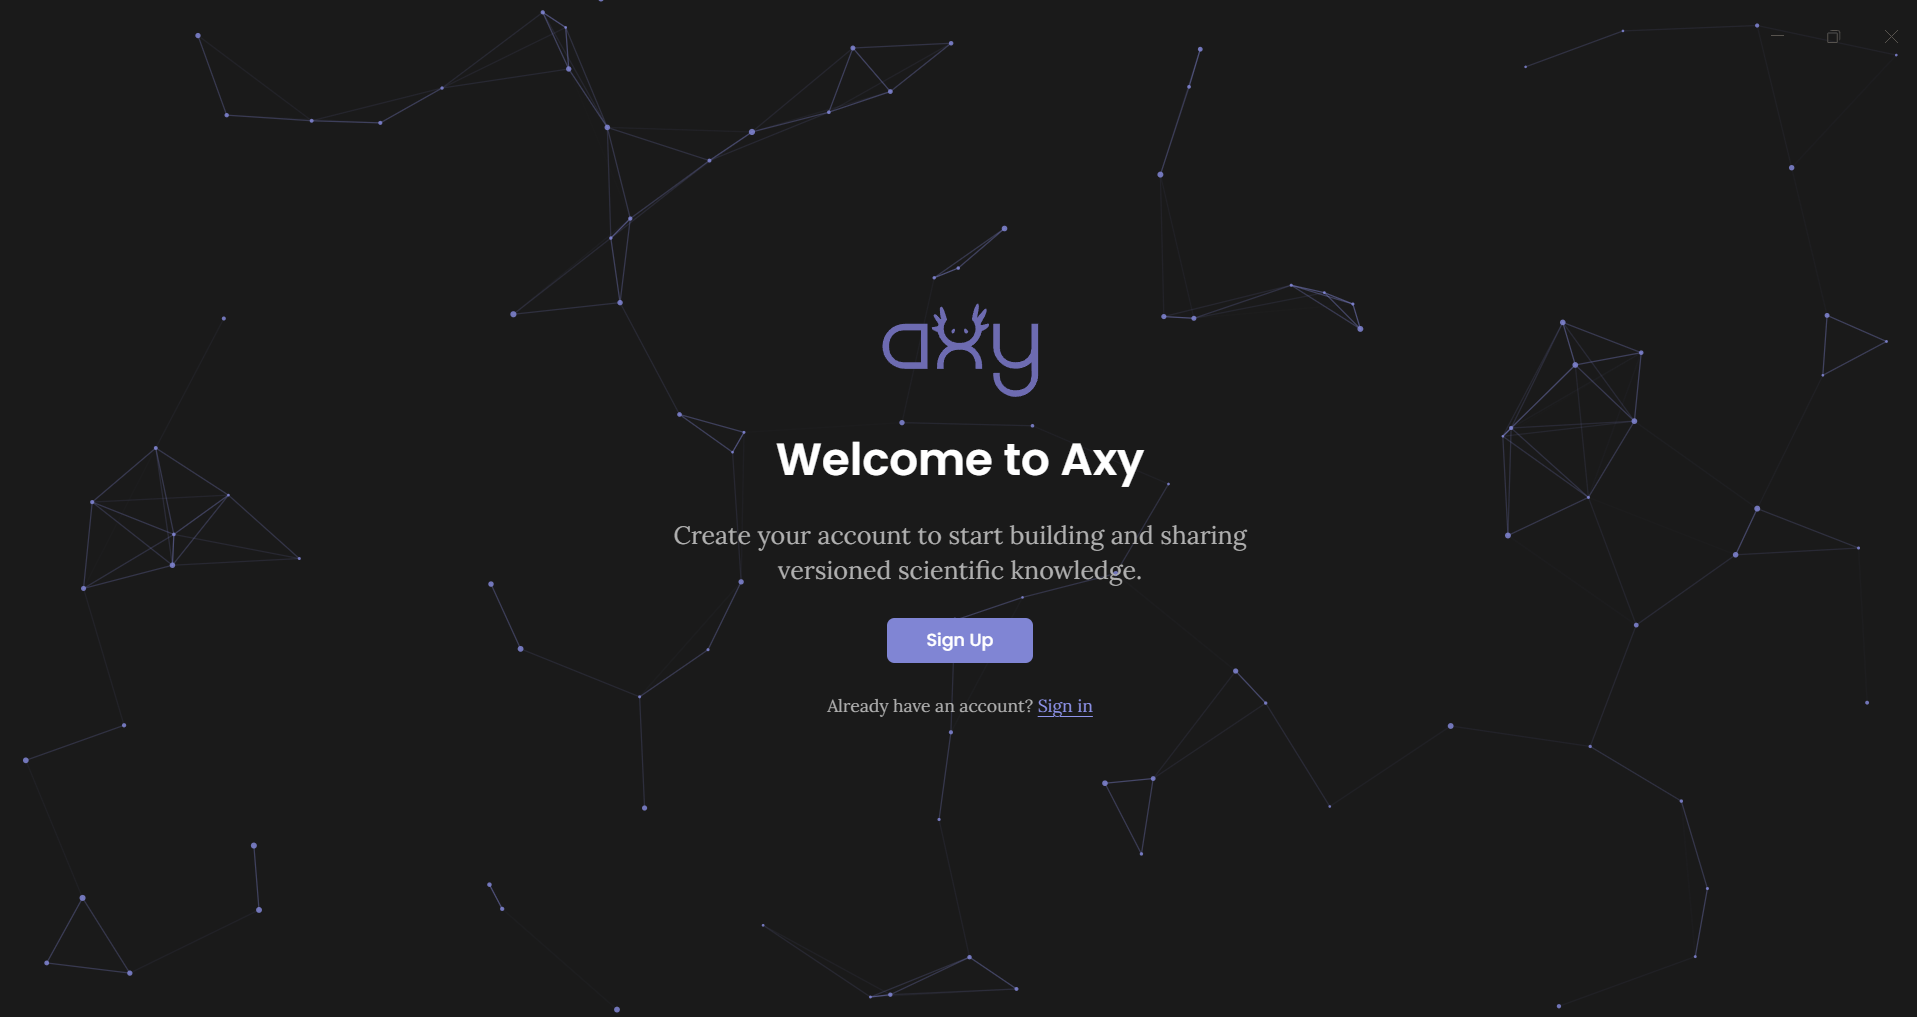
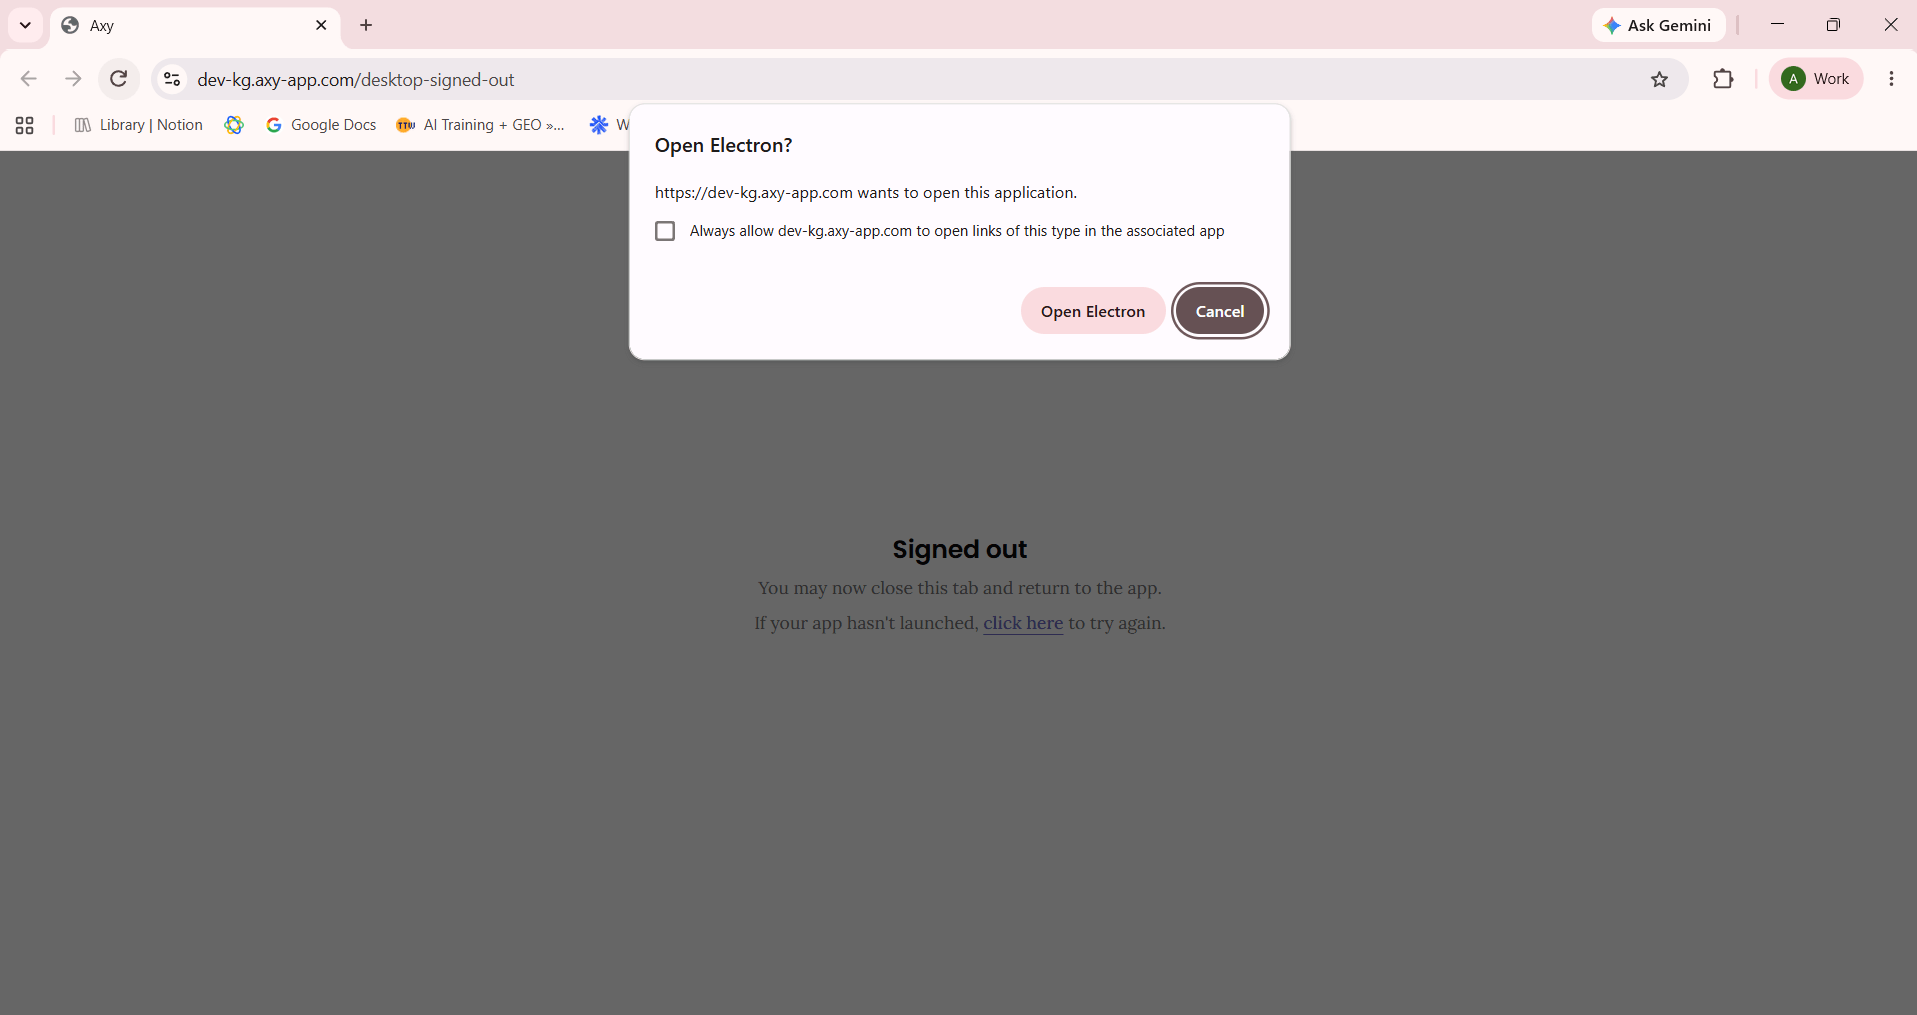
When you click Sign up, your system browser opens instead of a form inside the desktop app. That is expected. Your OS may ask permission to re-open Axy; this simply lets the browser hand you back to the desktop app after authentication.
Finish signing up in the browser, and it hands you back to the desktop app automatically. If you get stuck at sign-in, see Set Up Your First Private Knowledge Graph And Invite Your Team.
What you can do now, and what needs Claude Code
Once in, you’re free to explore. Most of Axy works the moment you sign in. Nothing is gated behind anything else.
The only exception is Explore, which chats through your own Claude Code CLI. If you haven’t installed it, the Explore tab tells you so directly rather than failing quietly:
Claude Code isn’t installed Explore mode chats through your own Claude Code CLI. Copy the command below into a terminal to install it, then reopen this tab to start exploring — nothing else on the graph is affected.
curl -fsSL https://claude.ai/install.sh | bashOn Windows, that’s:
irm https://claude.ai/install.ps1 | iexInstalled but not signed in yet?
You’ll see a second prompt, Sign in to Claude Code, with a one-line command to run: claude auth login.
Either way, this is Explore-specific setup, not a requirement for the rest of Axy. You can come back to it later. Everything else on the graph is open to you already.
You’re ready to build
Installation is only the beginning. Once Axy is on your machine, the next step is to turn an empty graph into structured knowledge, starting with the concepts, relationships, and evidence your team actually works with.
'%3e%3cpath%20fill-rule='evenodd'%20clip-rule='evenodd'%20d='M120%20296L120%20280.035L120%20189.742L120%20120L356.293%20120H429.082L470%20120L470%20296L325.583%20296C298.92%20308.779%20268.624%20316%20236.5%20316C204.376%20316%20174.08%20308.779%20147.417%20296L120%20296Z'%20fill='%23B6C1EB'/%3e%3c/g%3e%3cg%20id='Ellipse%20142'%20filter='url(%23filter1_f_0_8)'%3e%3cpath%20fill-rule='evenodd'%20clip-rule='evenodd'%20d='M147.417%20296C137.774%20291.379%20128.607%20286.031%20120%20280.035L120%20189.742L120%20120L356.293%20120L429.082%20120C429.689%20125.758%20430%20131.595%20430%20137.5C430%20206.449%20387.622%20266.268%20325.584%20296C298.92%20308.779%20268.624%20316%20236.5%20316C204.376%20316%20174.08%20308.779%20147.417%20296Z'%20fill='%23FFFFE6'/%3e%3c/g%3e%3cg%20id='Ellipse%20143'%20filter='url(%23filter2_f_0_8)'%3e%3cpath%20fill-rule='evenodd'%20clip-rule='evenodd'%20d='M120%20189.742C141.632%20225.693%20183.01%20250%20230.5%20250C300.364%20250%20357%20197.394%20357%20132.5C357%20128.278%20356.76%20124.107%20356.293%20120L120%20120L120%20189.742Z'%20fill='white'/%3e%3c/g%3e%3c/g%3e%3cdefs%3e%3cfilter%20id='filter0_f_0_8'%20x='-6.38111e-08'%20y='4.01978e-08'%20width='590'%20height='436'%20filterUnits='userSpaceOnUse'%20color-interpolation-filters='sRGB'%3e%3cfeFlood%20flood-opacity='0'%20result='BackgroundImageFix'/%3e%3cfeBlend%20mode='normal'%20in='SourceGraphic'%20in2='BackgroundImageFix'%20result='shape'/%3e%3cfeGaussianBlur%20stdDeviation='60'%20result='effect1_foregroundBlur_0_8'/%3e%3c/filter%3e%3cfilter%20id='filter1_f_0_8'%20x='20'%20y='20.0001'%20width='510'%20height='396'%20filterUnits='userSpaceOnUse'%20color-interpolation-filters='sRGB'%3e%3cfeFlood%20flood-opacity='0'%20result='BackgroundImageFix'/%3e%3cfeBlend%20mode='normal'%20in='SourceGraphic'%20in2='BackgroundImageFix'%20result='shape'/%3e%3cfeGaussianBlur%20stdDeviation='50'%20result='effect1_foregroundBlur_0_8'/%3e%3c/filter%3e%3cfilter%20id='filter2_f_0_8'%20x='20'%20y='20.0002'%20width='437'%20height='330'%20filterUnits='userSpaceOnUse'%20color-interpolation-filters='sRGB'%3e%3cfeFlood%20flood-opacity='0'%20result='BackgroundImageFix'/%3e%3cfeBlend%20mode='normal'%20in='SourceGraphic'%20in2='BackgroundImageFix'%20result='shape'/%3e%3cfeGaussianBlur%20stdDeviation='50'%20result='effect1_foregroundBlur_0_8'/%3e%3c/filter%3e%3c/defs%3e%3c/svg%3e)


