


Knowledge Graphs aren’t another stack of information. Its value grows exponentially as more people contribute to its information that’s structured, connected, and maintained. That’s why the first setup matters.
Without writing a single line of code, you can define where the graph lives, who can access it, and the vocabulary everyone will use to build and add the concept relationships.
By the end of this guide, you’ll have a private knowledge graph with a shared structure and the right people invited to contribute. Read the whole path, screen by screen.
1. Sign up
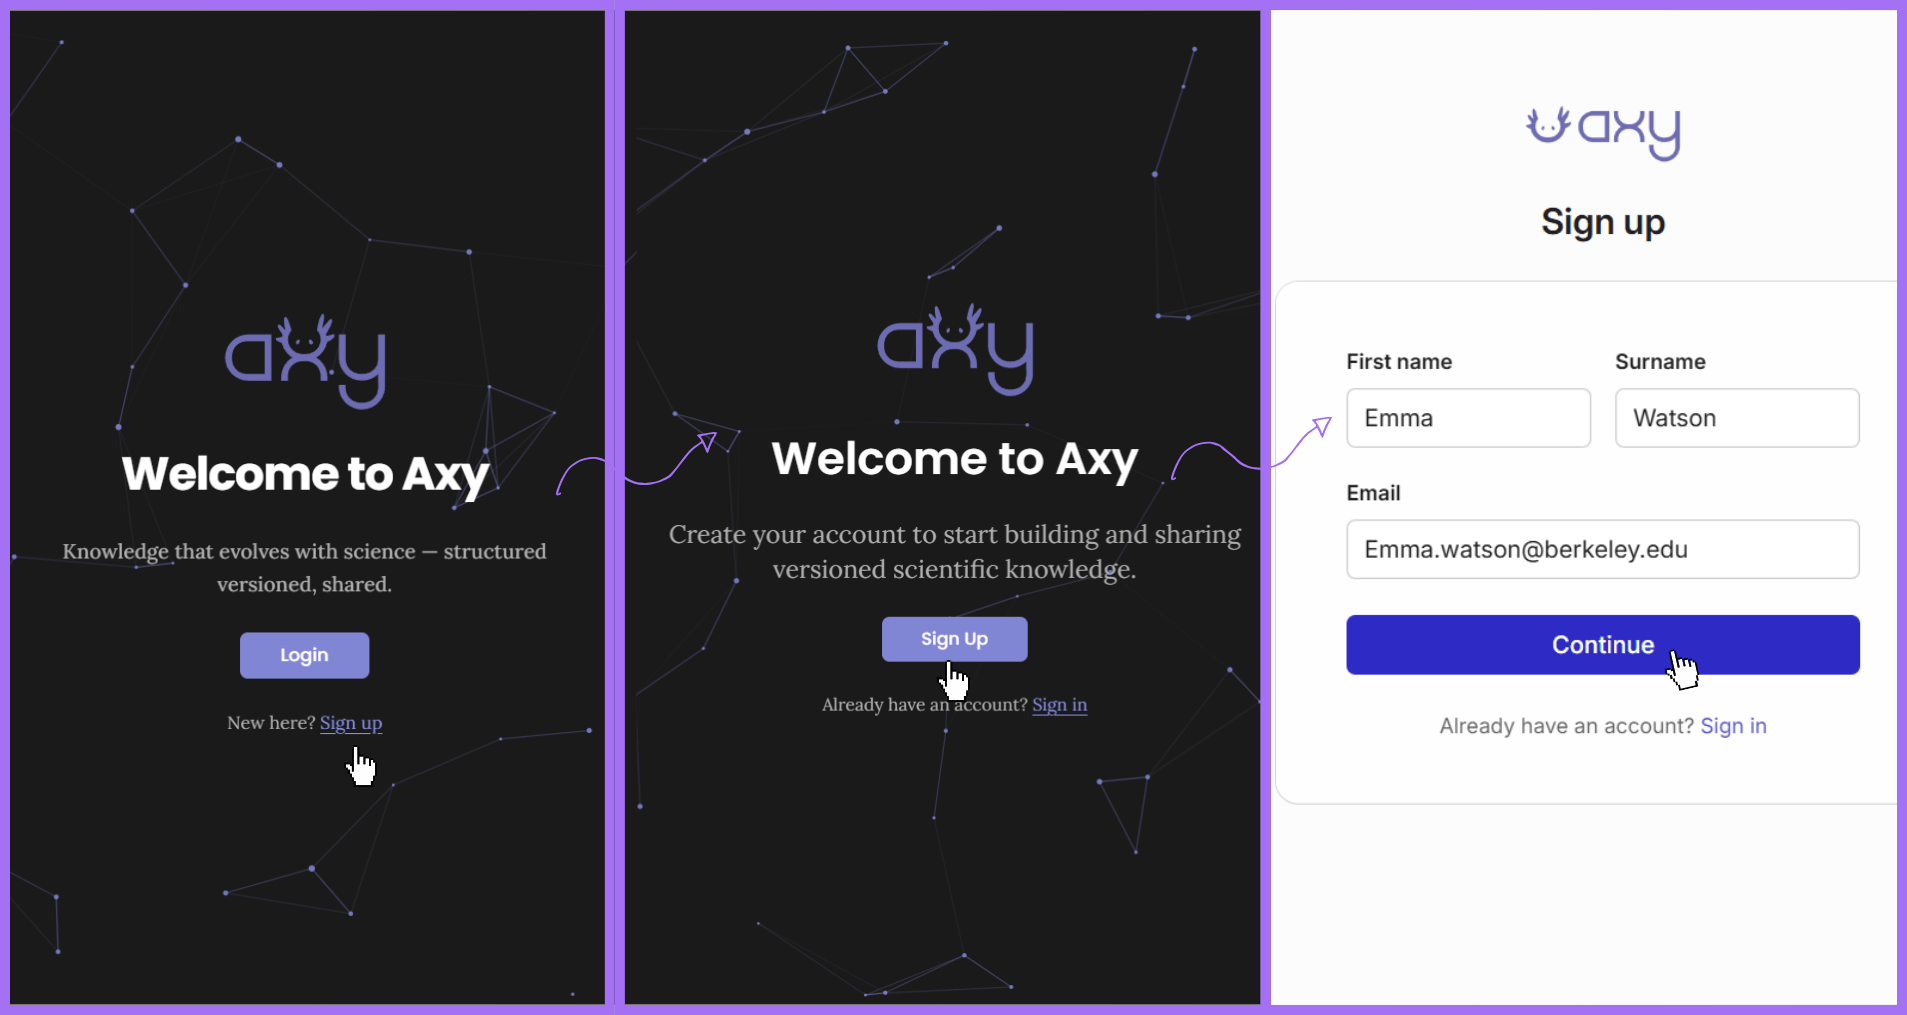
Create your account by clicking on Sign up. Add the basic required details along with your institutional email or an SSO provider. Axy doesn’t drop you straight into a graph after that. Every knowledge graph you create belongs to your organisation, and a fresh account doesn’t have one yet, so you land on the create-organisation screen first.
This isn’t a step you can skip past. There’s no graph to see until an organisation exists to hold it.
2. Create the organisation
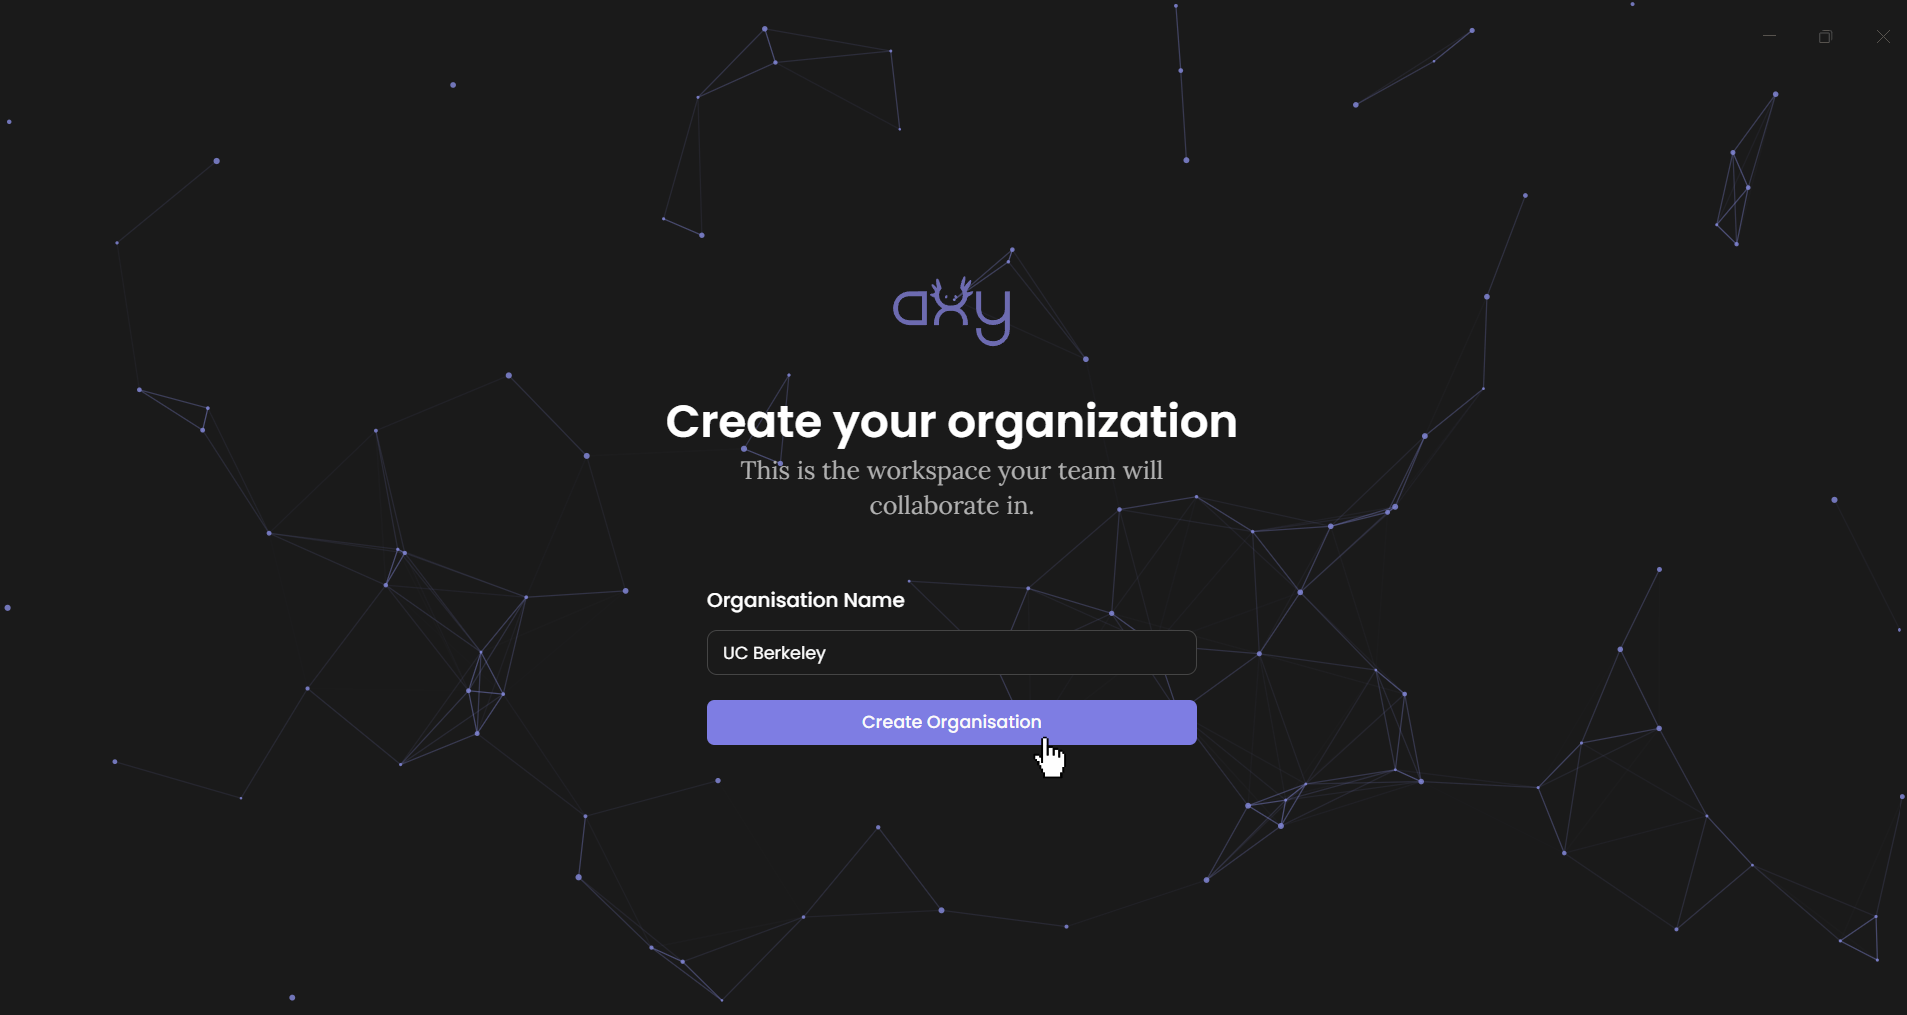
Name your organisation, confirm, done. By doing this every researcher can bring different expertise, interpret evidence differently, and contribute knowledge from different parts of a field. So, your graph doesn’t exist in isolation but belongs to a team and a larger body of work.
3. Create the graph
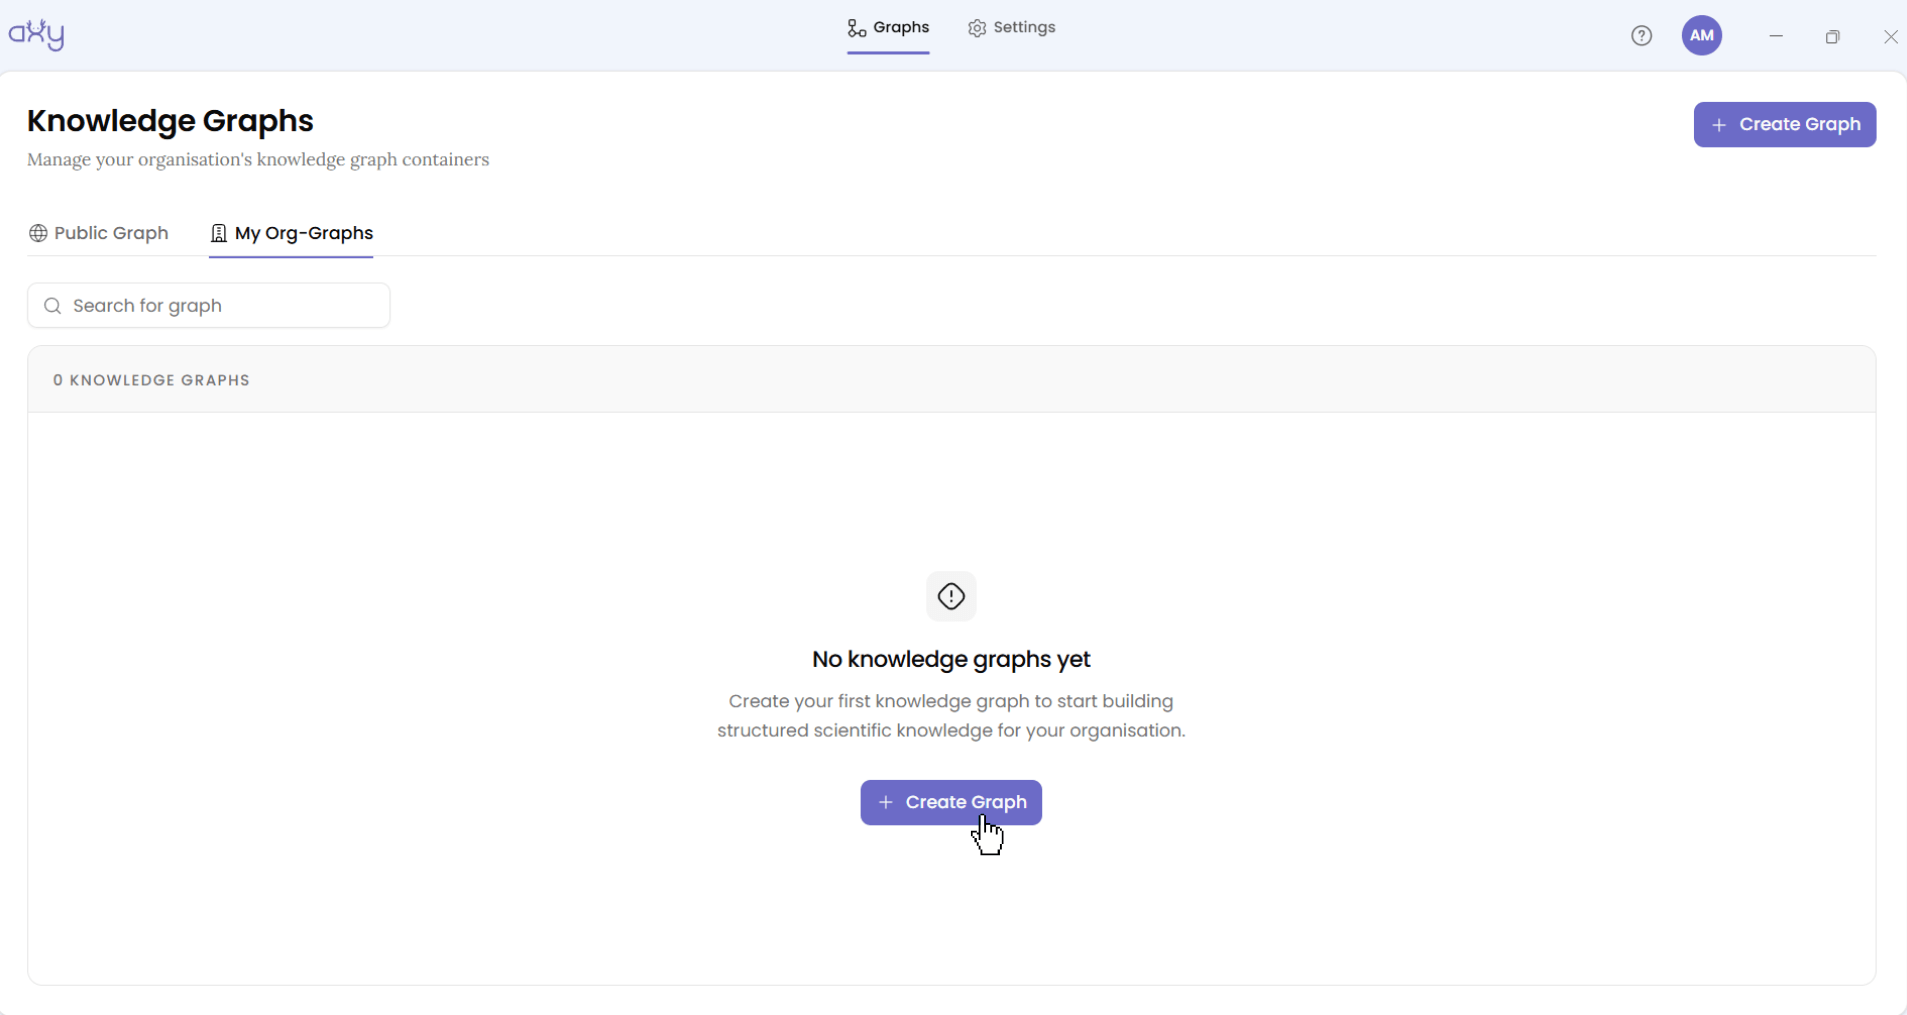
From here you land on Explore Knowledge Graphs. The default tab shows public graphs from across every organisation on Axy, useful for browsing later but not what you want right now. Switch to the My Org-Graphs tab and use the + button to start one of your own.
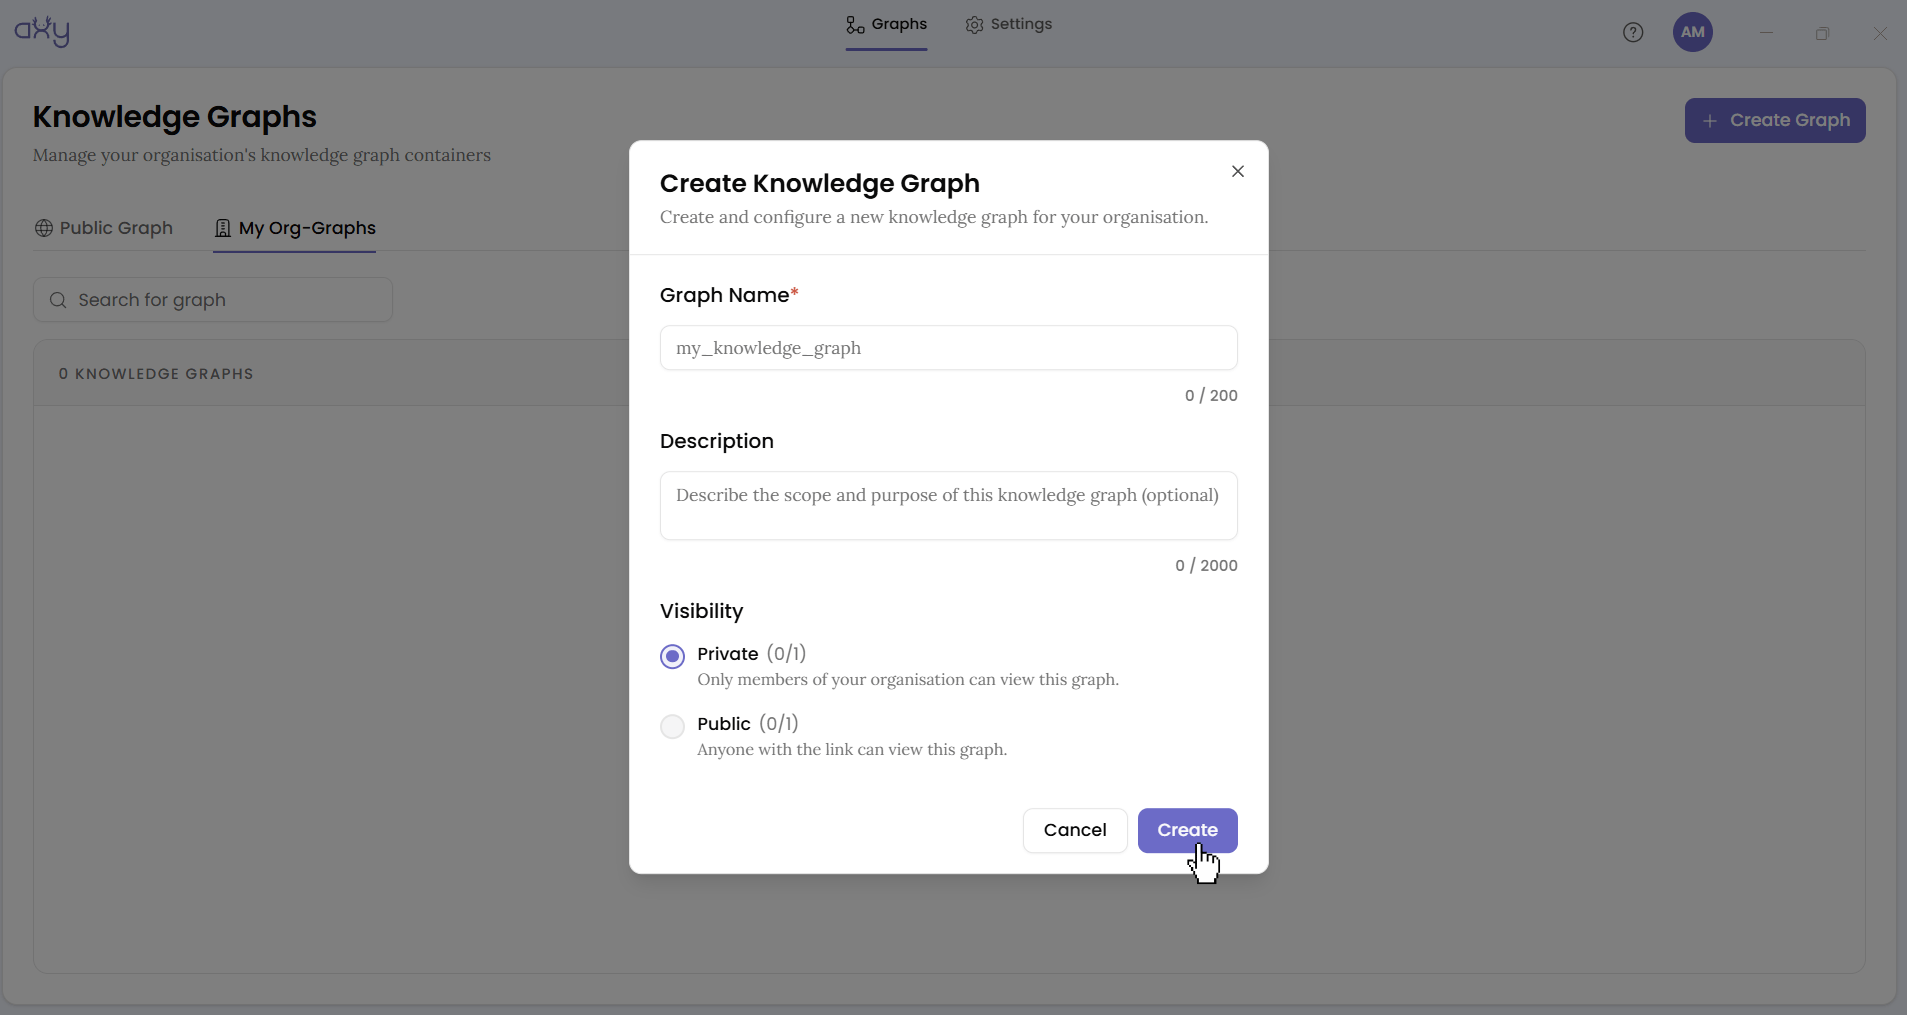
The create dialog asks for a name and a description, plus a Private/Public toggle. It defaults to Private, meaning only people you explicitly add to your organisation or the graph can see it. That default matters if you’re modelling something you’re not ready to show anyone outside your team yet: early-stage work, an internal taxonomy, or a first pass at something you plan to open up later. You can always make a graph public afterward; undoing that is harder.
Save it, and you’ll see a confirmation toast. Your graph now exists, empty, waiting for its structure.
4. Configure its vocabulary
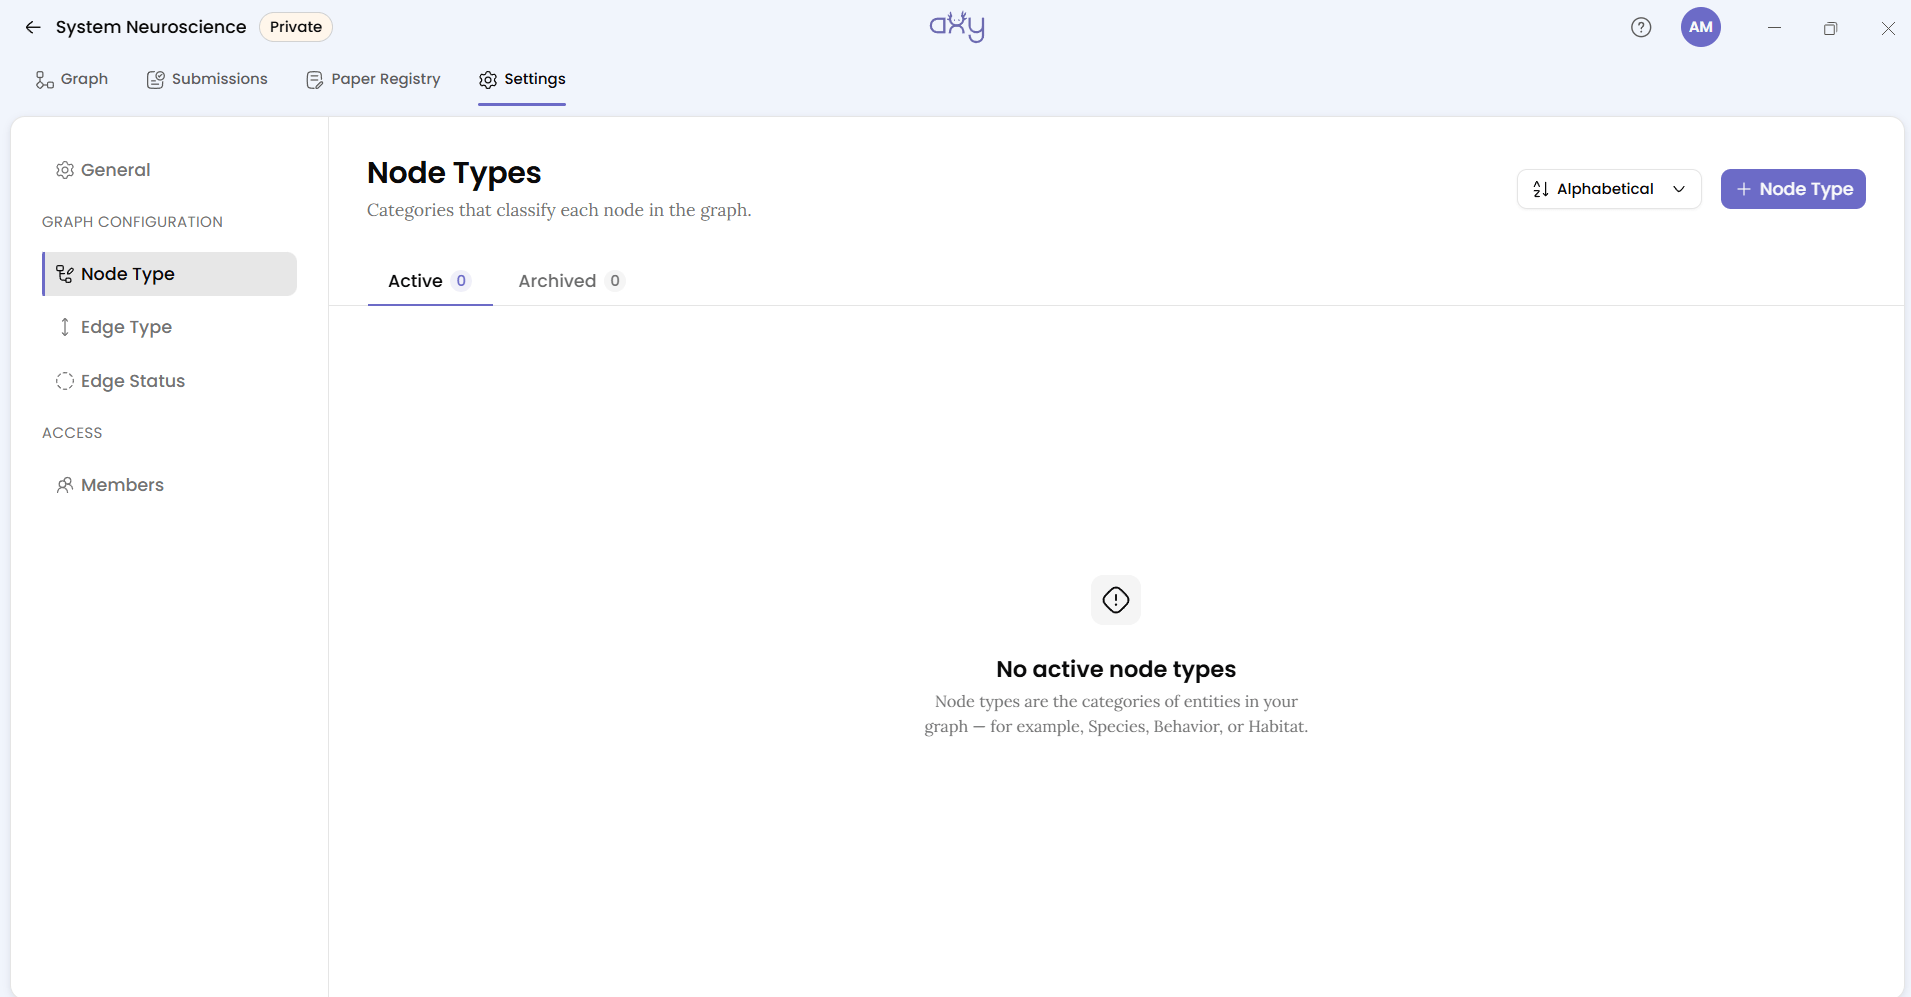
Start with the vocabulary your team understands and expects to use. As your graph grows, you can refine the structure. Open the graph’s Settings. The left pane has three tabs that decide what your graph is allowed to contain. Node Types are all the kinds of things that can exist in your graph. Nodes make a concept in your field rather than a random label, so set them to match how your team talks about the subject. Edge Types are the kinds of relationships those concepts can have with each other, and they’re what turns a pile of nodes into an actual graph instead of a list. Edge Statuses indicate the states which a relationship can be in as your team works through reviewing it.
Each graph defines its own vocabulary from scratch. Axy doesn’t hand you a fixed schema for biology or any other field. That’s deliberate: setting these before you add content means everyone on your team proposes changes against the same shared vocabulary from the first submission onward, instead of each person inventing their own types as they go.
5. Add a member
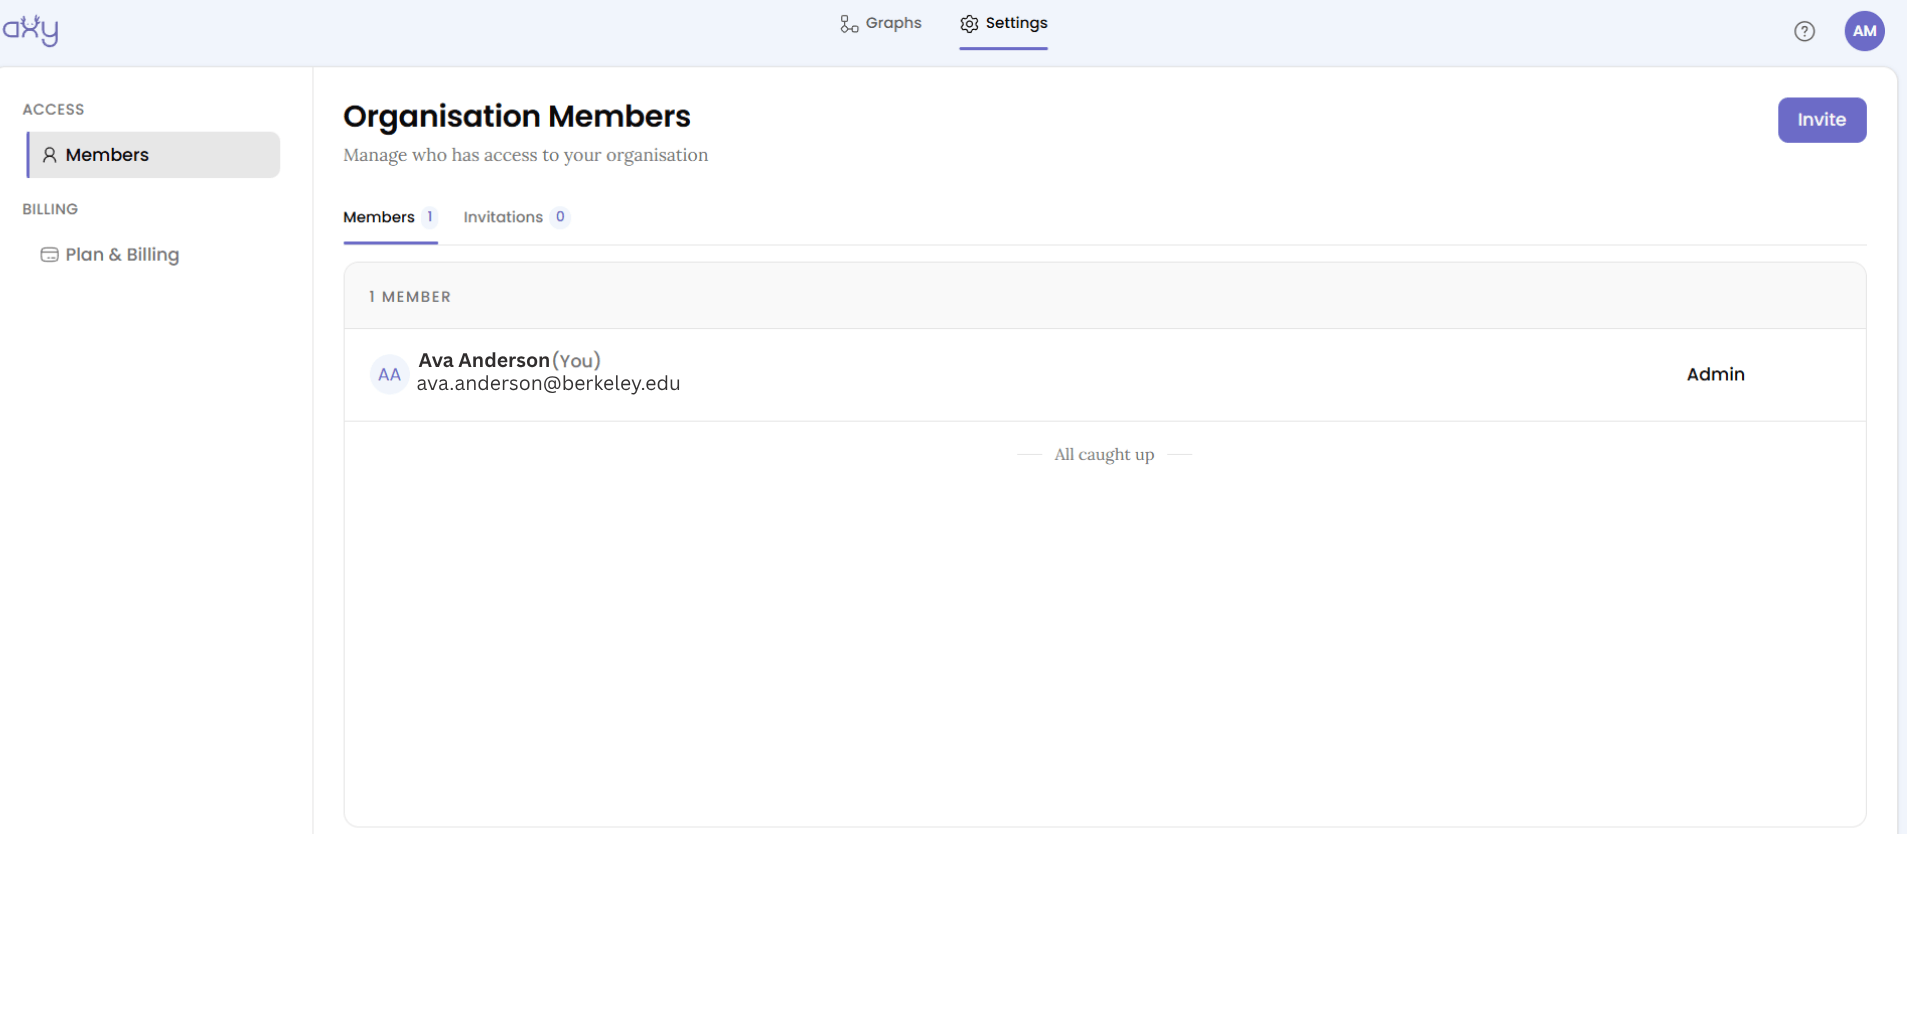
Once the graph itself is shaped, bring your team in. Members can propose changes and help build knowledge inside the graph, but they don’t have access to Settings. Under Settings, the Members tab splits into Direct Access and Organisation, the people added directly to this graph versus everyone in your org who can already reach it. Use the Invite dialog to add someone by email.
Inviting someone means choosing a role, and the role is the real decision here. An Admin can do everything, including reaching Settings itself: the vocabulary, the member list, the graph’s visibility. A Member can propose changes and take part in review, but doesn’t see Settings at all. View only can read the graph without being able to submit changes to it.
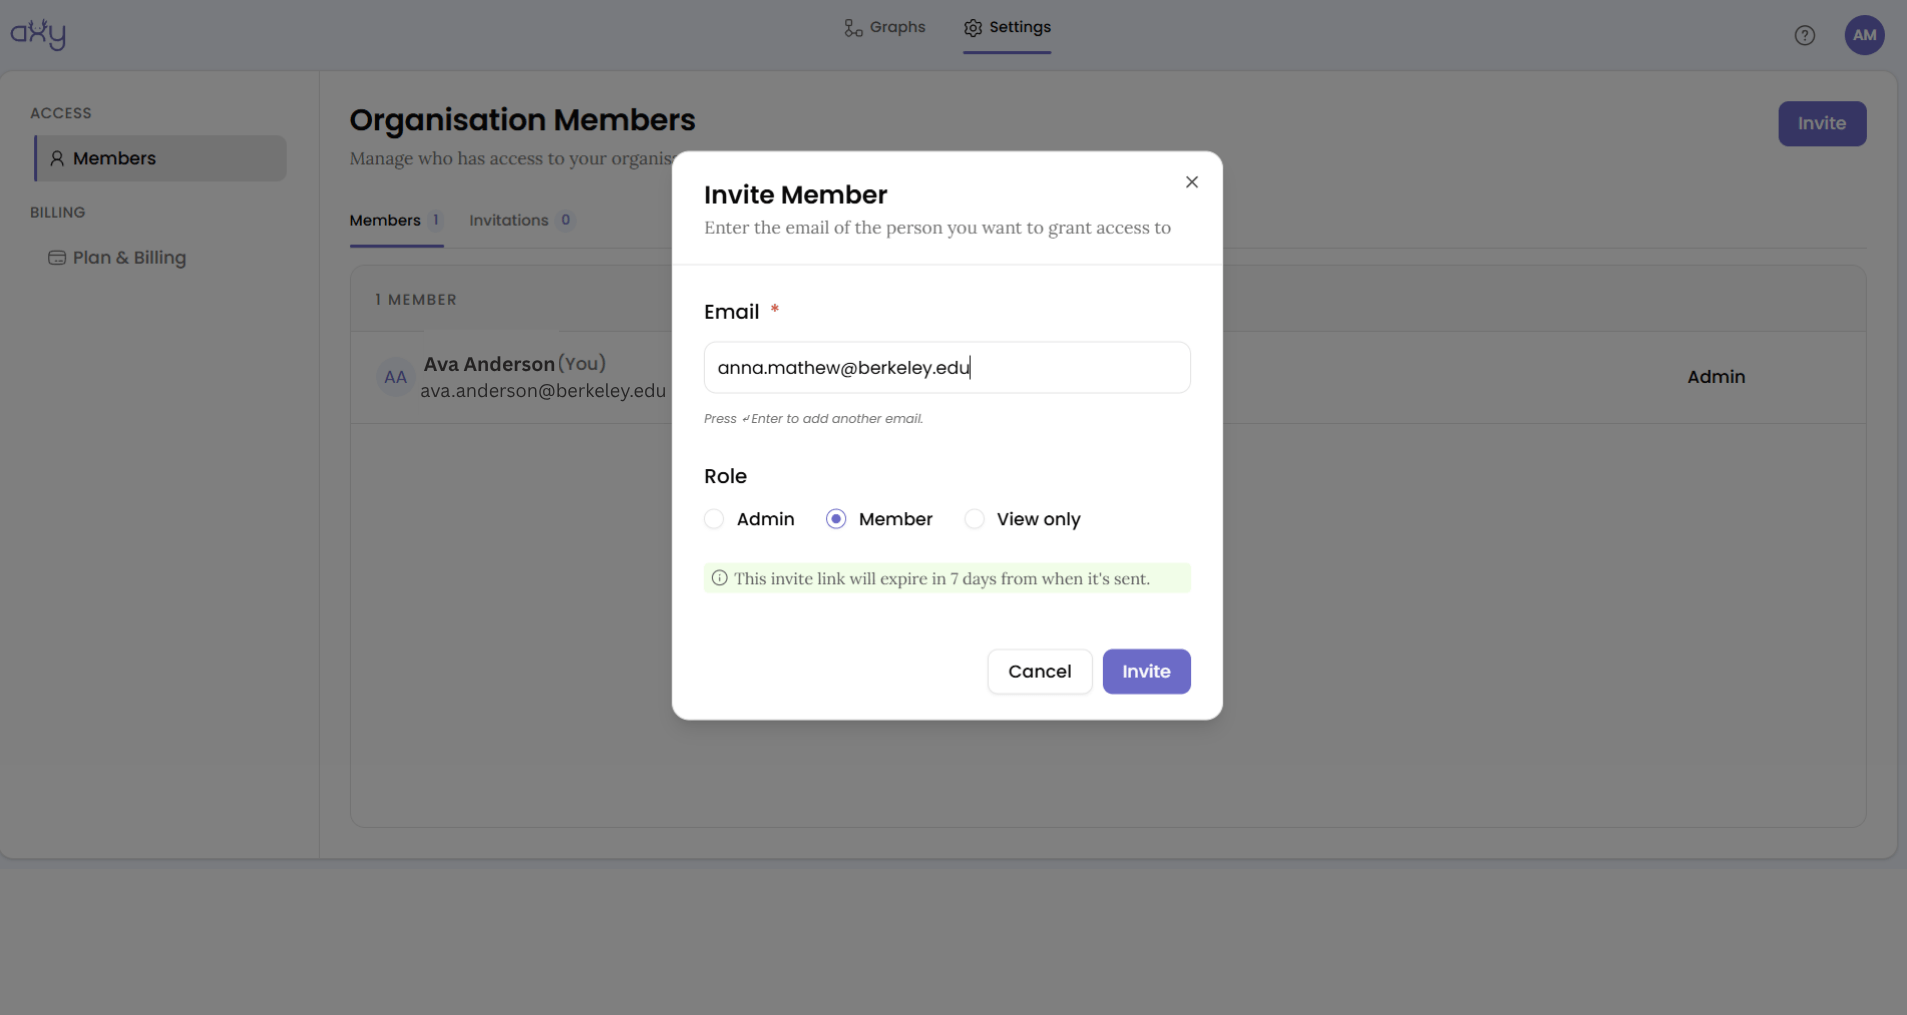
Pick based on who should be shaping the graph’s structure versus who should just be working within it. Most people you add for day-to-day contribution belong as Members; reserve Admin for whoever is responsible for keeping the vocabulary consistent.
6. The one thing to know before you start
If someone invites you as a Member rather than an Admin, you can’t access the Settings tab. Settings, Node Types, Edge Types, or Members are set to admin-only, and a Member account simply won’t see it. That’s not a bug to troubleshoot, it’s how the roles are supposed to work. If you’re the one setting a graph up for your team for the first time, make sure you’re doing it as an Admin. And if you’re joining a graph someone else started, don’t be surprised when the tab this walkthrough spends most of its length inside isn’t there for you.
What’s next?
Now that your private knowledge graph is set up, you’re ready to start contributing to it.
Next: Learn how to propose your first nodes and edges, attach evidence, and review each other’s submissions.
If you’d like to try this with your own team, ask whoever manages your organisation’s Axy account for an invite, or set one up yourself if you’re getting started fresh. The steps above are the whole path.
'%3e%3cpath%20fill-rule='evenodd'%20clip-rule='evenodd'%20d='M120%20296L120%20280.035L120%20189.742L120%20120L356.293%20120H429.082L470%20120L470%20296L325.583%20296C298.92%20308.779%20268.624%20316%20236.5%20316C204.376%20316%20174.08%20308.779%20147.417%20296L120%20296Z'%20fill='%23B6C1EB'/%3e%3c/g%3e%3cg%20id='Ellipse%20142'%20filter='url(%23filter1_f_0_8)'%3e%3cpath%20fill-rule='evenodd'%20clip-rule='evenodd'%20d='M147.417%20296C137.774%20291.379%20128.607%20286.031%20120%20280.035L120%20189.742L120%20120L356.293%20120L429.082%20120C429.689%20125.758%20430%20131.595%20430%20137.5C430%20206.449%20387.622%20266.268%20325.584%20296C298.92%20308.779%20268.624%20316%20236.5%20316C204.376%20316%20174.08%20308.779%20147.417%20296Z'%20fill='%23FFFFE6'/%3e%3c/g%3e%3cg%20id='Ellipse%20143'%20filter='url(%23filter2_f_0_8)'%3e%3cpath%20fill-rule='evenodd'%20clip-rule='evenodd'%20d='M120%20189.742C141.632%20225.693%20183.01%20250%20230.5%20250C300.364%20250%20357%20197.394%20357%20132.5C357%20128.278%20356.76%20124.107%20356.293%20120L120%20120L120%20189.742Z'%20fill='white'/%3e%3c/g%3e%3c/g%3e%3cdefs%3e%3cfilter%20id='filter0_f_0_8'%20x='-6.38111e-08'%20y='4.01978e-08'%20width='590'%20height='436'%20filterUnits='userSpaceOnUse'%20color-interpolation-filters='sRGB'%3e%3cfeFlood%20flood-opacity='0'%20result='BackgroundImageFix'/%3e%3cfeBlend%20mode='normal'%20in='SourceGraphic'%20in2='BackgroundImageFix'%20result='shape'/%3e%3cfeGaussianBlur%20stdDeviation='60'%20result='effect1_foregroundBlur_0_8'/%3e%3c/filter%3e%3cfilter%20id='filter1_f_0_8'%20x='20'%20y='20.0001'%20width='510'%20height='396'%20filterUnits='userSpaceOnUse'%20color-interpolation-filters='sRGB'%3e%3cfeFlood%20flood-opacity='0'%20result='BackgroundImageFix'/%3e%3cfeBlend%20mode='normal'%20in='SourceGraphic'%20in2='BackgroundImageFix'%20result='shape'/%3e%3cfeGaussianBlur%20stdDeviation='50'%20result='effect1_foregroundBlur_0_8'/%3e%3c/filter%3e%3cfilter%20id='filter2_f_0_8'%20x='20'%20y='20.0002'%20width='437'%20height='330'%20filterUnits='userSpaceOnUse'%20color-interpolation-filters='sRGB'%3e%3cfeFlood%20flood-opacity='0'%20result='BackgroundImageFix'/%3e%3cfeBlend%20mode='normal'%20in='SourceGraphic'%20in2='BackgroundImageFix'%20result='shape'/%3e%3cfeGaussianBlur%20stdDeviation='50'%20result='effect1_foregroundBlur_0_8'/%3e%3c/filter%3e%3c/defs%3e%3c/svg%3e)


